What is 3D Printing ?

Invented by a man named Chuck Hull back in 1986, 3D printing is a
process of taking a digital 3D model and turning that digital file into a
physical object. While Hull went on to launch one of the world’s largest 3D printer manufacturers, 3D Systems,
his invention concentrated solely on a fabrication process called
Stereolithography (SLA). Since that time numerous other 3D printing
technologies have been developed, such as Fused Deposition Modeling
(FDM)/Fused Filament Fabrication (FFF), Selective Laser Sintering (SLS),
PolyJetting and others, all of which rely on layer-by-layer fabrication
and are based on a computer code fed to the printer.
While there are numerous technologies which can be used to 3D print
an object, the majority of 3D printers one will find within a home or an
office setting are based on the FDM/FFF or SLA processes, as these
technologies are currently cheaper and easier to implement within a
machine. We will go further into detail about these technologies and
others a little bit later.
‘3D printing’ can also be referred to as ‘additive manufacturing,’
especially when referring to its use within a manufacturing setting, and
many individuals will used both phrases interchangeably.
How Do 3D Printers Work?

This is a broad question, which was partially explained in the
section above. With that said, the best way to really understand how 3D
printing works is to understand the various technologies
involved. Similarly to the way that engines function based on some of
the same principles as one another, but don’t all use gasoline or solar
power, all 3D printers don’t use the same base technology, but still
manage to accomplish the same basic tasks. Before we get into each of
these individual technologies, however, one should understand the basic
principles of transferring a 3D model on a computer screen to a 3D
printer.
3D printing or additive manufacturing is a process of making three
dimensional solid objects from a digital file. The creation of a 3D
printed object is achieved using additive processes. In an additive
process an object is created by laying down successive layers of
material until the entire object is created. Each of these layers can be
seen as a thinly sliced horizontal cross-section of the eventual
object.
Computers are not like humans; they can’t just look at a 3D model and
simply tell their friend ‘Mr. 3D Printer’ what to print. Lot’s of 1s
and 0s are involved, meaning lots and lots of computer code. Once a 3D
model is designed or simply downloaded off of a repository like Thingiverse, the file (these usually have extensions such as 3MF, STL, OBJ, PLY, etc.) must be converted into something called G-code.
G-code is a numerical control computer language used mainly for
computer aided manufacturing (both subtractive and additive
manufacturing). It is a language which tells a machine how to move.
Without G-code there would be no way for the computer to communicate
where to deposit, cure or sinter a material during the fabrication
process. Programs such as Slic3r
are required in order to convert 3D model files into G-code. Once the
G-code is created it can be sent to the 3D printer, providing a
blueprint as to what its next several thousand moves will consist of.
These steps all add up to the complete fabrication of a physical object.
There are other computer languages out there and perhaps many will
eventually gain popularity, but for now G-code is by far the most
important.
What Is 3D Printing Used for and by Whom?
While initially 3D printing was primarily a technology for
prototyping, this is quickly changing. Now numerous manufacturers are
producing end-use components and entire products via additive
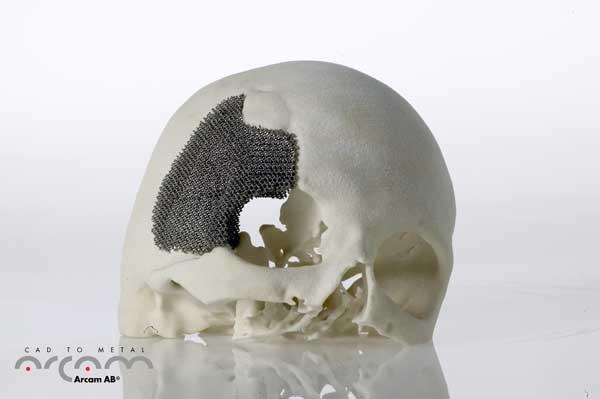
manufacturing. From the aerospace industry, to medical modeling and
implantation, to prototyping of all kinds, 3D printing is being used by
virtually every major industry on the planet in one way or another.
Medicine:
3D printed models of human organs have been a frequent tool for surgeons over the last two to three years, as they provide a more intricate view of the issues at hand. Instead of relying on 2D and 3D images on a computer screen or a printout, surgeons can actually touch and feel physical replicas of the patient’s organs, bone structures, or whatever else they are about to work on.
Additionally, there is research underway by companies like Organovo
to 3D print partial human organs such as the liver and kidney.
Organovo is already 3D printing live human liver tissue for
pharmaceutical toxicology testing. They do so by using a process similar
to an FDM desktop 3D printer that you might find in a home, but instead
of thermoplastics and heat, they use hydrogels infused with living
cells. Over the next decade, this research should really begin to pay
dividends, and within 15 to 20 years it’s very possible that we will be
3D printing entire human organs for transplantation.
Customized open source prosthetic limb fabrication is another important area 3D printing is excelling. Organizations such as Enabling The Future
are printing prosthetic hands on sub-$2,000 3D printers by the
hundreds, offering those with upper limb amputations something to cheer
about. Besides 3D printing hands and arms, as well as legs, we have also
seen 3D printed prosthetics for animals of all kinds, including a titanium jaw for a turtle, a shell for a tortoise, and legs for ducks, geese and even canines.
Aerospace:
Because of the unique geometries offered by additive manufacturing, militaries around the world, as well as agencies such as NASA and the ESA, along with numerous aircraft manufacturers are turning to 3D printing in order to reduce the overall weight of their aircraft. Complex geometries and new materials offer superior strength with less mass, potentially saving organizations like NASA boatloads of fuel, and thus money, during the launching of spacecraft and/or rockets out of our atmosphere. At the same time, companies like Boeing and Airbus are using 3D printing to reduce the weight of their aircraft, allowing them to cut fuel costs for each flight.
Prototyping:
Manufacturing facilities across the globe are using 3D printing as a way to reduce costs, save time, and produce better products. By no longer needing to outsource the prototyping of parts, companies are able to quickly iterate upon designs on the fly, oftentimes saving weeks of waiting for third parties to return molds or prototypes. From automobile manufacturers to electronics companies and anyone in between, 3D printing is an invaluable technology.
 Art/Education:
3D printing is able to bring the imagination to life. Artists are not
only able to jot their ideas down on a computer screen, they are able to
physically bring those ideas into reality via digital models. What this
technology does is it unleashes a whole new medium for creativity, not
only for artists but for children and young adults who are now able to
better visualize concepts, create functional products, and learn via
hands-on experience.
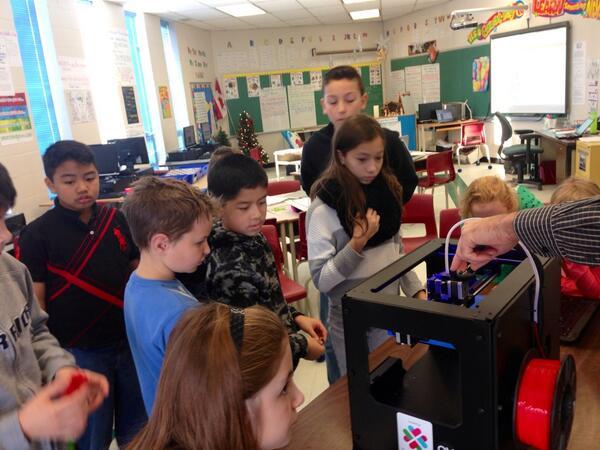
Over the next several years we will see an incredible expansion of
the number of elementary, middle and high schools incorporating 3D
printing into their curricula. This will in effect set these students up
for careers which will almost certainly require 3D printing in one way,
shape or form over the next decade or two.
Future of 3D Printing ?
It is predicted by some additive manufacturing advocates that this
technological development will change the nature of commerce, because
end users will be able to do much of their own manufacturing rather than
engaging in trade to buy products from other people and corporations.
3D printers capable of outputting in colour and multiple materials
already exist and will continue to improve to a point where functional
products will be able to be output. With effects on energy use, waste
reduction, customization, product availability, medicine, art,
construction and sciences, 3D printing will change the manufacturing
world as we know it.
Comments
Post a Comment